Specialization of Livestock Farms
I remember my father saying many years ago, that we needed to keep our farm diversified because of changing weather conditions and markets. Today’s farmers obviously think otherwise!
I remember my father saying many years ago, that we needed to keep our farm diversified because of changing weather conditions and markets. Today’s farmers obviously think otherwise!
Mushrooms: A Potential Forest Farming Endeavor
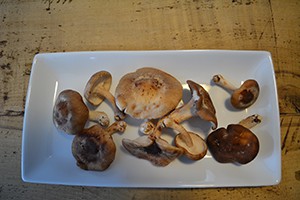
There’s a chance that, if you own a farm in central Virginia, it came with a few (or more than a few) acres of forest land. If you’re a Charlottesville farmer with a woodlot, you should consider the advantages of shiitake mushroom cultivation. It can be a fulfilling (both intrinsically and, of course financially) thing to do with your land and time in the off-season. Shiitake mushrooms are in high demand this time of year. The USDA estimates that they sell for $12-20 per pound (retail). As far as mushrooms go, “shiitake” has a fairly marketable name recognition, but there are many different species of mushroom that could prove profitable: maitake, lion’s mane, and oyster just to name a few.
To begin you would buy mushroom spores marked either sawdust or dowel spawn, referring to the material through which the spores have been run. Shiitake inoculators will generally run you $1-1.50 per log; oyster and lion’s mane inoculators $2, and maitake $3. Spawn comes in “warm season,” “cold season,” and “wide range” variants, referring of course to the climate that best suits the spores. Most people use cold season spawn for the spring and fall and either warm season or wide range for the summer, but new growers should try experimenting as much as they feel inclined.
Growers should only inoculate logs that have been recently cut. It’s recommended that you inoculate at most a few days after cutting. This way you can be sure that your spores are the only fungus contributing to the breakdown of the log. The recommended dimensions are three to eight inches in diameter and between two and four feet long. The logs of oak trees are prime candidates for inoculation, as are many other hardwood trees common to the land in central Virginia. If you’re dealing with maitake, keep in mind that you can actually inoculate the stumps of old trees! Inoculating logs with sawdust spawn is a fairly simple process. After you drill holes in the log, you only need a plunger or similar “inoculation tool.” For dowel, insert dowel spawn plugs into the logs and hammer flush with (or right below) the surface of the log. You want to inoculate by drilling a row of holes into the log and offsetting the holes in the next row. To figure out how many holes to drill, simply subtract the number of inches of the log by 1. This is not a hard and fast rule, just a guide. Then keep the logs incubated until the mushroom has had a chance to fully colonize the log. After this, you want to lay the logs out in the shade (between 75-80% shade) and make sure to keep moisture levels high. To determine how much moisture your batch is getting, it’s useful to have a “moisture log”; that is, a log that is not inoculated but experiences the same conditions as your inoculated logs. Simply cut a piece off, weigh it, and put it in the oven. Then weigh it again.
You must take steps to sterilize the inoculation site. The most common way to do this is to use food-grade wax at about 400 degrees. It’s not always enough to sterilize the inoculation points; one must coat any raw wood sites in wax. That means branch stubs, the ends of the log…anywhere that the interior of the log is exposed. Grab a turkey baster (metal is recommended for the hot wax) and get to work!
If you’re reading this from Charlottesville or one of the surrounding counties, you probably already know that there is a built-in market for fresh, local food. Mushrooms are no exception. The prominence of the farm-to-table movement in Charlottesville means that there are a wealth of restaurants, grocery stores, and farmers’ markets that need local food, and fast. If you’re already a farmer and you’re looking to diversify your crops and keep busy in the off-season, mushroom farming may be for you. This is meant to serve as only an introduction to mushroom farming. There is much more info out there. Check out the USDA’s guide to farming mushrooms for more information.
There is no denying the efficiency of GPS (global positioning system) guidance systems when it comes to agriculture. Whether on a small organic farm in central Virginia or a sprawling corn field in the Midwest, precision farming tools such as GPS navigation systems can cut input costs down considerably. The prices of such systems are going down even as their capabilities become more refined. This is intended to help inundate the operators of central Virginia farms to the technology and help them decide if GPS navigation could be of use. The major benefits are well-documented. Farmers will save money on inputs (like pesticides, seed, fertilizer, labor, etc.) through more deliberate use and application. These systems vary based on price and capabilities; as such, level of input savings are quite variable. GPS navigation systems are used for field mapping, variable rate planting, record keeping/insurance purposes, and parallel swathing. Automated guidance of agricultural vehicles (tractors, combines, etc.) means that farm operators don’t have to constantly make steering adjustments while preoccupied with other farm duties. In the long run, they can save you money on labor while helping to maximize the efficiency of your inputs.
When combined with navigation aids, GPS goes a long way. Parallel tracking devices make it easy for an operator to visualize his or her position relative to previous go-rounds. The light bar is a particularly useful advent when it comes to application of farm resources (such as pesticides or fertilizers). The light bar is essentially a series of LED lights, ranging from a foot to a foot-and-a-half long. It’s usually linked to GPS and microprocessors and is suspended directly in front of the operator so he or she can concentrate on the path while also taking note of the bar. Imagine it mounted near the rear-view mirror on your tractor or other farm vehicle. If the light is dead-center, it means the operator is on the correct path for application. If it’s off-center, it means the operator is veering off. So for example, if the LEDs on your light bar are illuminated left-of-center, it means you’re going off track in that direction. Software allows the operator to determine how sensitive the system is, and it also allows the operator to control the distance between swaths. It provides the operator’s current location in the field and a computer interface analyzes past traffic patterns for guidance. Most systems have a screen which displays the swath of the machine. Many of these systems are not relegated to straight lines, making them useful for the hilly terrain typical of some central Virginia farms (especially in the Greater Charlottesville area). These systems are also useful for record-keeping and can easily come up with “as-applied” maps which show previous coverage and application patterns. It is also useful for mapping patches of land that aren’t treated (such as wet spots or otherwise unusable portions).
Auto-steering systems combined with GPS have the above capabilities and can also automatically steer your vehicle. It’s often a mounted device on a steering column. Accuracy is subject to the quality of differential correction and the power of the internal processors, and of course, the more you spend, the more precise your system will be.
It all depends on your needs. If you’re operating a farm near Charlottesville, chances are you won’t need your auto-steering vehicles to be accurate to the centimeter, and the up-front costs for the higher-end systems tend to be pretty high.
Foam markers seem to be the most common navigation aid used during fertilizer/pesticide application. They are used to align the applicates during return passes. An air pump pressurizes a tank which contains the foam agent. The systems dispense foam blobs on the ground, and operators use blobs the way Hansel and Gretel used breadcrumbs; to judge where they’ve already been.
GPS guidance systems have several advantages over foam markers. First, they are far more reliable, greatly reducing skip and overlap rates. They’re more accurate at higher speeds, and are far easier to use. They also conserve inputs like fertilizer, pesticides, etc. Foam isn’t as convenient for crops that are higher off the ground. It’s also more difficult to use in conditions with poor visibility: nighttime, dust, fog, etc. Sometimes it’s better to plant and apply at night, when it’s less windy. GPS guidance systems are less affected by weather in general. They also have fewer repeat costs…you have to consistently buy foam, water, and other components for the foam marker system. In certain situations you may need a satellite subscription to use GPS, but on central Virginia farms, you can usually use the Coast Guard Beacon or WAAS for differential correction. In addition, some GPS systems can collect spatial data or save money in other areas. Documentation is also pretty useful; it’s helpful to record when and where you did certain work for insurance reasons or just record-keeping.
The most frequently discussed disadvantage when it comes to GPS guidance systems? The upfront costs. They tend to pay for themselves in the long run, but the pricing starts at around $1,500, and that’s without the autosteer capabilities. It’s definitely more expensive than foam markers, but could have considerable benefits as well. Is it right for you? Depends on crop, acreage, swathing accuracy, etc. Missteps in application can prove to be quite costly as well; how much does skipping a round of pesticides cost you if you lose half of your yield? Skips are much costlier when it comes to higher value crops. At the end of the day, GPS is more efficient than conventional methods like foam markers or, worse yet, visual estimation. Efficiency is greatly increased when it comes to yield monitoring, field mapping, etc. It also takes some of the stress and pressure off of farm operators, both mentally and physically. If farming is something you plan on doing for a while, it’s definitely worth considering.